月別アーカイブ: 2008年7月

Net UserAgent Mobile GPSを試してみた

まずはインストール。
pear install -f -o Net_UserAgent_Mobile_GPS
WARNING: failed to download pear.php.net/Net_UserAgent_Mobile_GPS within preferr
ed state "stable", will instead download version 0.1.0, stability "alpha"
downloading Net_UserAgent_Mobile_GPS-0.1.0.tgz ...
Starting to download Net_UserAgent_Mobile_GPS-0.1.0.tgz (4,463 bytes)
.....done: 4,463 bytes
install ok: channel://pear.php.net/Net_UserAgent_Mobile_GPS-0.1.0

レンタルサーバーを使っていて、「インストールできない!」というような人は、Pearをレンタルサーバーにインストールするへ。

テスト
http://www.mryworks.com/test/Net_UserAgent_Mobile_GPS/

au、docomo、softbankでそれぞれの結果に
docomoなら
array(2) {
["url"]=>
string(15) "http://test.com"
["tag"]=>
string(42) "<a href="http://test.com">GPS.TEST</a>"
}

au、docomo、softbankの3キャリア変換が超めんどうなんだよね。
http://php-develop.org/MobilePictogramConverter/
http://phpspot.org/blog/archives/2008/07/phpgpsnet_usera.html

便利なのがいろいろ出てきたし、これらを組み合わせて何か作ってみる?

Pearをレンタルサーバーにインストールする

レンタルサーバーでは、インストールされていないので新しいpearライブラリを使えない。
また、インストールしようとしても「アクセス権がありません」と出て触れない。これはpearが共有されているから。

Net_UserAgent_Mobile_GPS試したいな…。
pear install -f -o Net_UserAgent_Mobile_GPS
あれインストールできない(´・ω・`)とかしている諸君、それを使うには自分のスペースにpearをインストールしなきゃいけないんだぜ!

※さくらインターネットの場合。
1. UTF-8 TeraTerm Proを使ってSSHでログインする。
[アカウント].sakura.ne.jp
id:[アカウント]、password:[サーバーのパスワード]

2. ログインできたら、pear listをしてみる。
これが今使えるpearライブラリのリストになります。少ないw
%pear list
Installed packages, channel pear.php.net:
=========================================
Package Version State
Archive_Tar 1.3.2 stable
Console_Getopt 1.2.3 stable
DB 1.7.13 stable
HTML_Template_IT 1.2.1 stable
HTTP 1.4.0 stable
HTTP_Client 1.1.1 stable
HTTP_Request 1.4.2 stable
Mail 1.1.14 stable
Net_SMTP 1.2.10 stable
Net_Socket 1.0.8 stable
Net_URL 1.0.15 stable
Net_UserAgent_Detect 2.4.0 stable
PEAR 1.6.2 stable
Structures_Graph 1.0.2 stable
XML_Parser 1.2.8 stable
XML_RPC 1.5.1 stable

3. .pearrcファイルを新規作成する。pearの設定ファイルです。
%pear config-create /home/[アカウント名] .pearrc

4. configの設定を行う。これで自分のレンタルスペースにpearをインストールできるようにします。
%pear config-set bin_dir /home/[アカウント名]/pear/bin
%pear config-set download_dir /home/[アカウント名]/pear/temp
%pear config-set temp_dir /home/[アカウント名]/pear/temp

5. 自分のレンタルスペースにあるpearを実行するためにパスを通します。これでディレクトリ名を省略して実行できるようになります。
ホームディレクトリにある.cshrcファイルのset pathに追加します。FTPでダウンロードして普通にテキストエディタで編集してアップ上書きでok。
17行目
set path = (/sbin /bin /usr/sbin /usr/bin /usr/games /usr/local/sbin /usr/local/bin /usr/X11R6/bin $HOME/bin)

set path = (~$HOME/pear/bin /sbin /bin /usr/sbin /usr/bin /usr/games /usr/local/sbin /usr/local/bin /usr/X11R6/bin $HOME/bin)

6. PEAR本体をインストール
%pear install PEAR

7. チャンネルアップデート
%pear channel-update pear.php.net

8. 使いそうなライブラリを適当にpear install

%pear list
Installed packages, channel pear.php.net:
=========================================
Package Version State
Archive_Tar 1.3.2 stable
Auth 1.6.1 stable
Auth_RADIUS 1.0.6 stable
Auth_SASL 1.0.2 stable
Cache 1.5.4 stable
Cache_Lite 1.7.4 stable
Console_Getopt 1.2.3 stable
Crypt_CHAP 1.0.1 stable
DB 1.7.13 stable
File_Passwd 1.1.6 stable
HTML_Common 1.2.4 stable
HTML_QuickForm 3.2.10 stable
HTTP 1.4.0 stable
HTTP_Client 1.1.1 stable
HTTP_Request 1.4.2 stable
Log 1.11.0 stable
MDB 1.3.0 stable
MDB2 2.4.1 stable
Mail 1.1.14 stable
Net_POP3 1.3.6 stable
Net_SMTP 1.3.1 stable
Net_Socket 1.0.8 stable
Net_URL 1.0.15 stable
Net_UserAgent_Mobile 1.0.0RC1 beta
Net_UserAgent_Mobile_GPS 0.1.0 alpha
PEAR 1.7.2 stable
Pager 2.4.6 stable
Structures_Graph 1.0.2 stable
XML_Parser 1.2.8 stable
XML_RPC 1.5.1 stable

9. 最後にphp.iniに追加
さくらの管理画面にログインし、「PHP設定ファイルの編集」
include_path=".:/home/[アカウント名]/pear/php"

10. 以上でインストール完了になります。

mod_rewriteを使わないcoolなurlの作り方

mod_rewriteは便利だけど、その条件数が膨大になったり、
.htaccessファイルがいろんなフォルダに散乱すると大変なことになる。

$_SERVER[“REQUEST_URI”]を使って、URLを整理する方法(Apache 2.0.30 以降で可能)があるらしいということで実験。

まずは、スラッシュなどの記号がURLエンコードされた(%2F)がURLに含まれる場合、うまく動かなくなるらしいので
AllowEncodedSlashes On
を、httpd.confに追記する。

httpd.conf
<VirtualHost *:80>
ServerName localhost
AllowEncodedSlashes On
</VirtualHost>

こんなファイルを用意する。
a
<php
$args = explode("/",$_SERVER["REQUEST_URI"]);
$args = array_map('urldecode', $args);
$args = array_map('htmlspecialchars', $args);
print_r($args);
?>

拡張子が残っていると見栄えが悪いので、以下の.htaccessを置いておく。
.htaccess
<FilesMatch "^a$" >
ForceType application/x-httpd-php
</FilesMatch>

試しにこのURLにアクセスしてみる。
http://localhost/example.com/test/cool-uri/a/test/%2F

出力結果
Array
(
[0] =>
[1] => example.com
[2] => test
[3] => cool-uri
[4] => a
[5] => test
[6] => /
)

$args[5]とか$args[6]とかを使って分岐処理したらいいだけだね!

おーし、サーバーにアップしてみようかな!

AcceptPathInfo ディレクティブ
説明: 後に続くパス名情報を受け付けるリソースの指定
構文: AcceptPathInfo On|Off|Default
デフォルト: AcceptPathInfo Default
コンテキスト: サーバ設定ファイル, バーチャルホスト, ディレクトリ, .htaccess
上書き: FileInfo
ステータス: Core
モジュール: core
互換性: Apache 2.0.30 以降で使用可能

さくら: Apache/1.3.39
XREA: Apache/1.3.39

(´・ω・`)

Ruby on Railsを試す

前回(RubyをApacheで動かす)の続きです。

RubyGemsでRuby on Railsをインストールします。
gem install rails -y

これを実行すれば、railsコマンド使えるようになります。

試しに、これを実行してみます。
rails -v

Railsのバージョンが確認できるはずです。

Railsはデフォルトでsqlite3を使うので、これに必要なWindows用バイナリとDLLを拾ってきましょう。
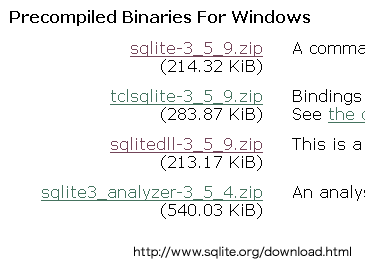
sqlite3.exe
sqlite.dllをパスの通ったディレクトリ(C:\ruby\bin)にコピーしてください。

次にRDBMSを利用するためのライブラリをインストールします。
gem install sqlite3-ruby

Windows用の sqlite3-ruby(mswin32)を選択します。

これでとりあえず完了!

では、早速Hello Worldアプリケーションに取り掛かることにしましょう。

プロジェクトの作成
rails address_book

コントローラを作成します。
ruby script\generate controller welcome

\address_book\app\controllers\welcome\hello
を以下のように編集。
class WelcomeController < ApplicationController
def hello
@hello = "hello world!" + Time.now.strftime(" at %Y-%m-%d %H:%M:%S")
render :action => :hello
end
end

\address_book\app\views\welcome\hello.rhtml
にHTMLテンプレートを用意する。
<html>
<p><%=h @hello %></p>
</html>

サーバーを起動させてみる。
ruby script/server
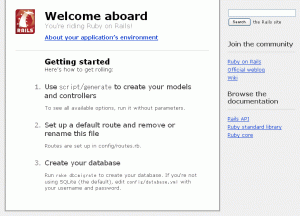
http://localhost:3000/welcome/hello/
にアクセス。うまくいった!

次に、テーブルの作成とコードを自動生成してみます。
ruby script\generate scaffold friend name:string nickname:string birthday:date

migrationファイルが一緒に生成されます。
NOT NULL制約、サイズ制限などを追加する場合は修正。
class CreateFriends < ActiveRecord::Migration
def self.up
create_table :friends do |t|
t.string :name
t.string :nickname
t.date :birthday
t.timestamps
end
end
def self.down
drop_table :friends
end
end

migrate。
rake db:migrate
(in C:/Program Files/Apache Group/Apache2/htdocs/ruby/address_book)
== 20080704044225 CreateFriends: migrating ====================================
-- create_table(:friends)
-> 0.0780s
== 20080704044225 CreateFriends: migrated (0.0780s) ===========================

きちんとテーブルが生成されたか調べてみる。
sqlite3 db\development.sqlite3

出力結果
pment.sqlite3
SQLite version 3.5.9
Enter ".help" for instructions
sqlite> .tables
friends schema_migrations
sqlite> .schema
CREATE TABLE "friends" ("id" INTEGER PRIMARY KEY AUTOINCREMENT NOT NULL, "name"varchar(255) DEFAULT NULL NULL, "nickname" varchar(255) DEFAULT NULL NULL, "birthday" date DEFAULT NULL NULL, "created_at" datetime DEFAULT NULL NULL, "updated_at" datetime DEFAULT NULL NULL);
CREATE TABLE "schema_migrations" ("version" varchar(255) NOT NULL);
CREATE UNIQUE INDEX "unique_schema_migrations" ON "schema_migrations" ("version"
);

サーバーを起動させてみる。
ruby script/server
http://localhost:3000/friend/

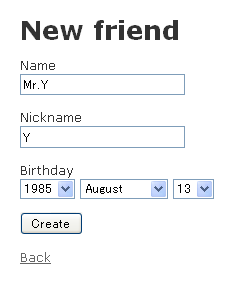
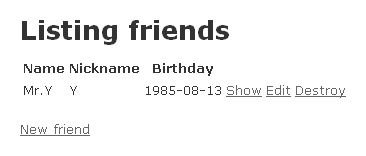
管理画面ができあがってる!?